Payment Rules - How to Set Up
reservie allows you to create and define discount payment rules which allow you to create offers for your events. Setting up a discount code requires two simple steps and once setup are ready for use.
Introduction
reservie allows you to create and define discount payment rules which allow to you create offers for your events. Setting up a discount code requires two simple steps and once setup are ready for use. These steps are:
- Define the payment rule
- Grant an event permission to use the payment rule
Step A - Define a payment rule
Step 1: Navigate to the payment rule section of reservie. This can be found in Advanced -> payment rules

Step 2: Once in the payment rules section, click the ‘Add rule’ button

Step 3: Complete the presented form
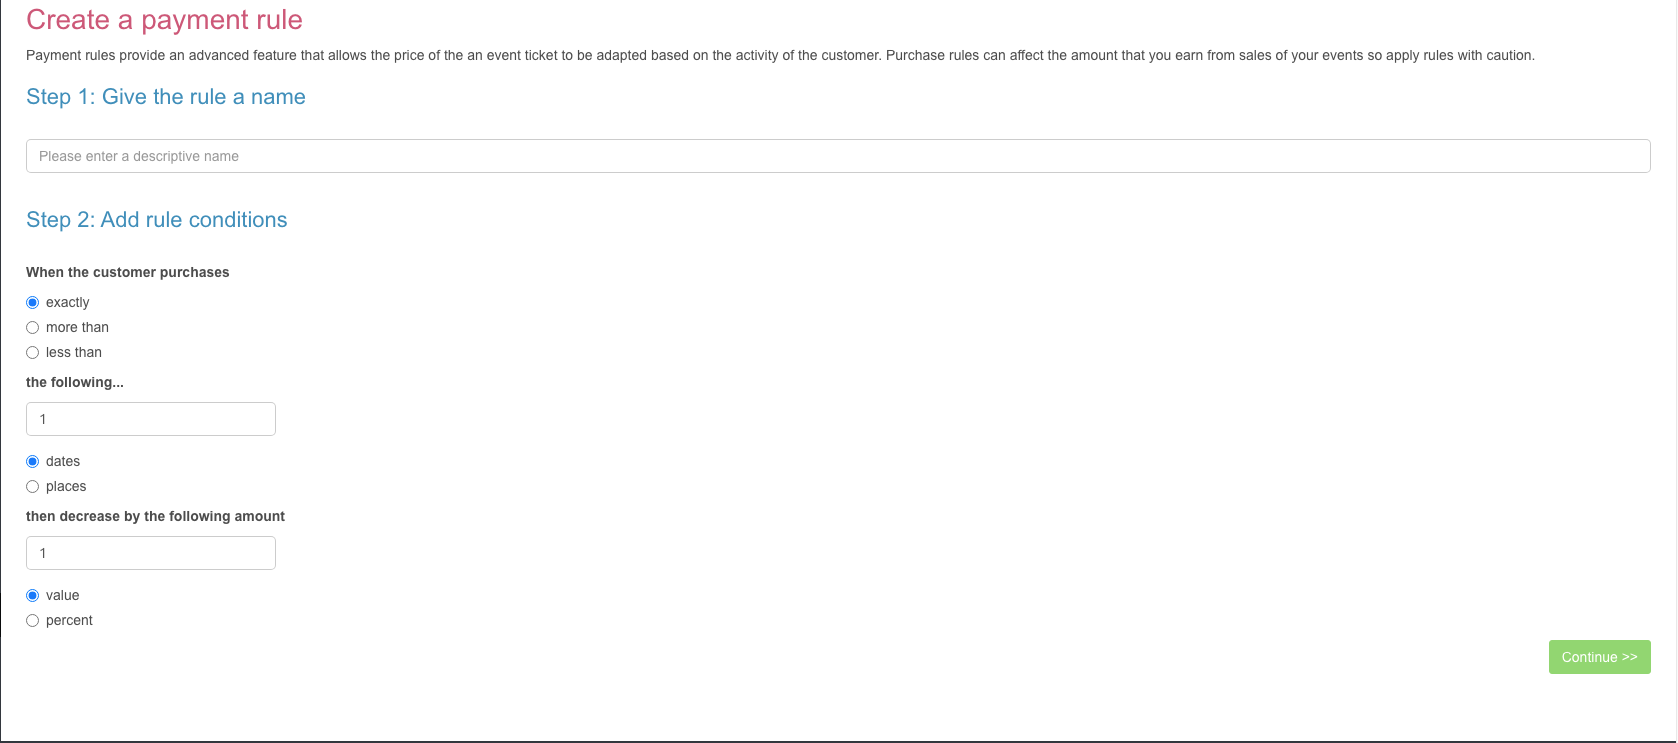
- Rule name - this is a note to yourself so that you can recognise the rule in future. It is not exposed to your clients.
- Rule condition - choose ‘exactly’ , ‘more than’ or **‘less than’ ** followed by number and rule type
- Reduction - select the amount for the decrease per event date.
Example: If you want to offer £1 off a class for each week, if a customer purchase 4 or more classes (i.e more than 3 dates) then the rule would be defined as follows:
Rule name: Discount if customer purchases 4 or more classes
Rule setup: When a customer purchases more than 3 dates then decrease by the following 1 value.
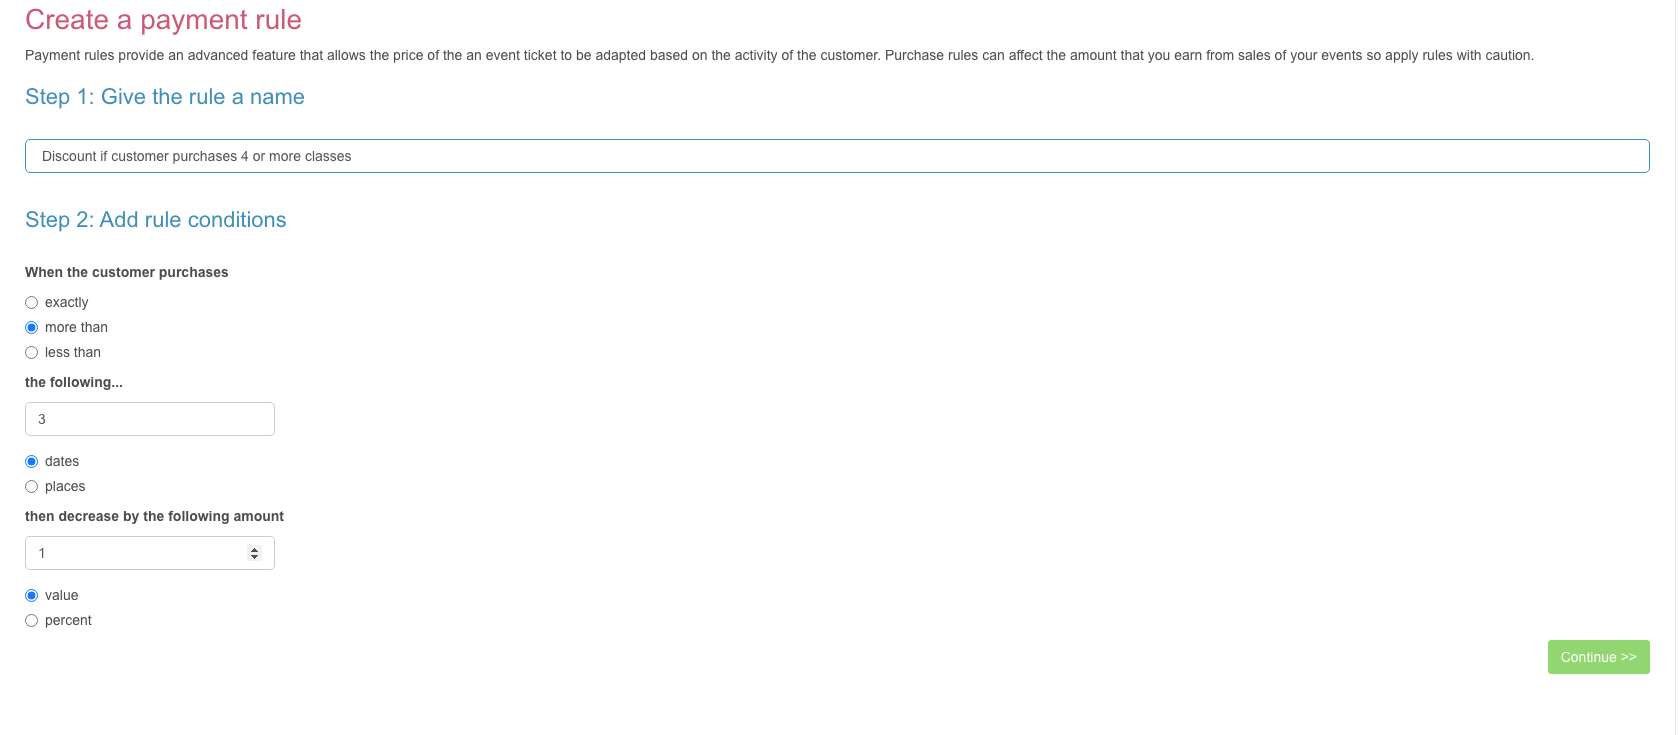
Click ‘continue’ to save the payment rule.
Step B - grant permission to an event
Once the payment rule has been assigned, you must explicitly tell events that customers are allowed to use it during checkout.
Step 1: Navigate to Events -> Course view
Step 2: Find your event in course view and click edit

Step 3: Walk through the wizard until you reach the pricing adjustments section
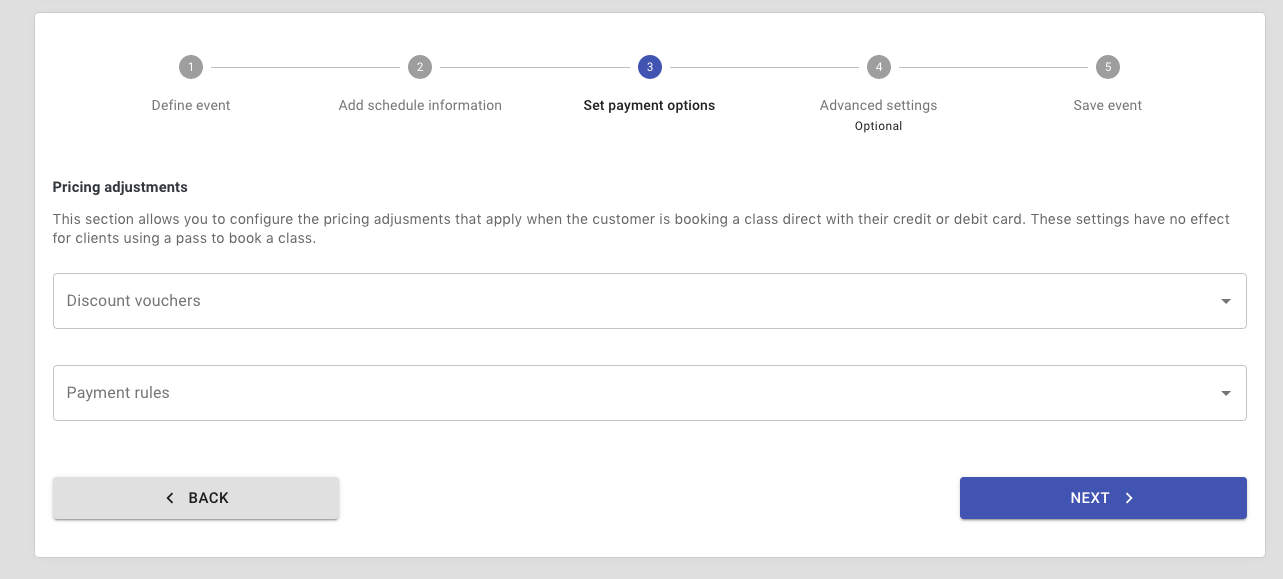
Step 4: Assign the discount voucher to event
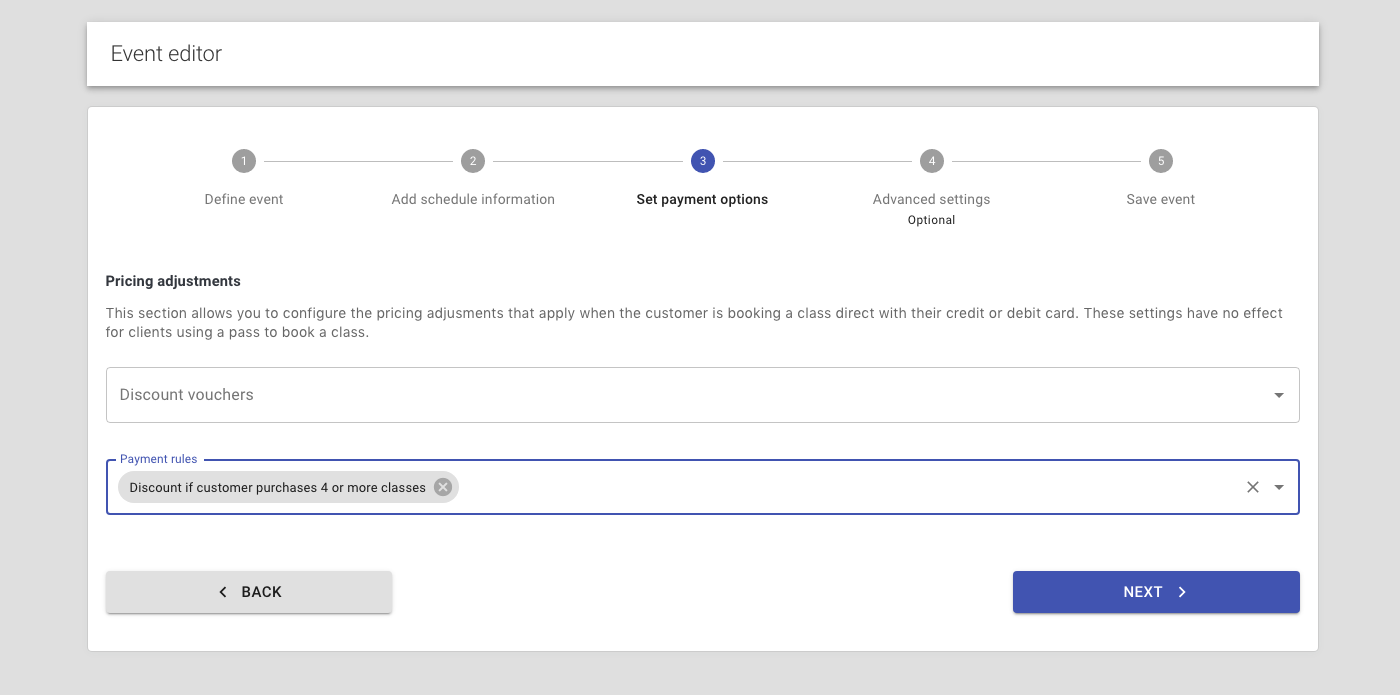
Step 5: Click next/save until you complete the wizard and the updated event saved. The payment rule is now ready for use.