Overview
Before customers can purchase a pass, you need to create one. The pass editor lets you configure credits, pricing, validity, and purchase restrictions across four steps.
Passes are managed from the Passes page in the sidebar menu.
Viewing existing passes
The Passes page displays all your passes in a table with Live and Archived tabs.
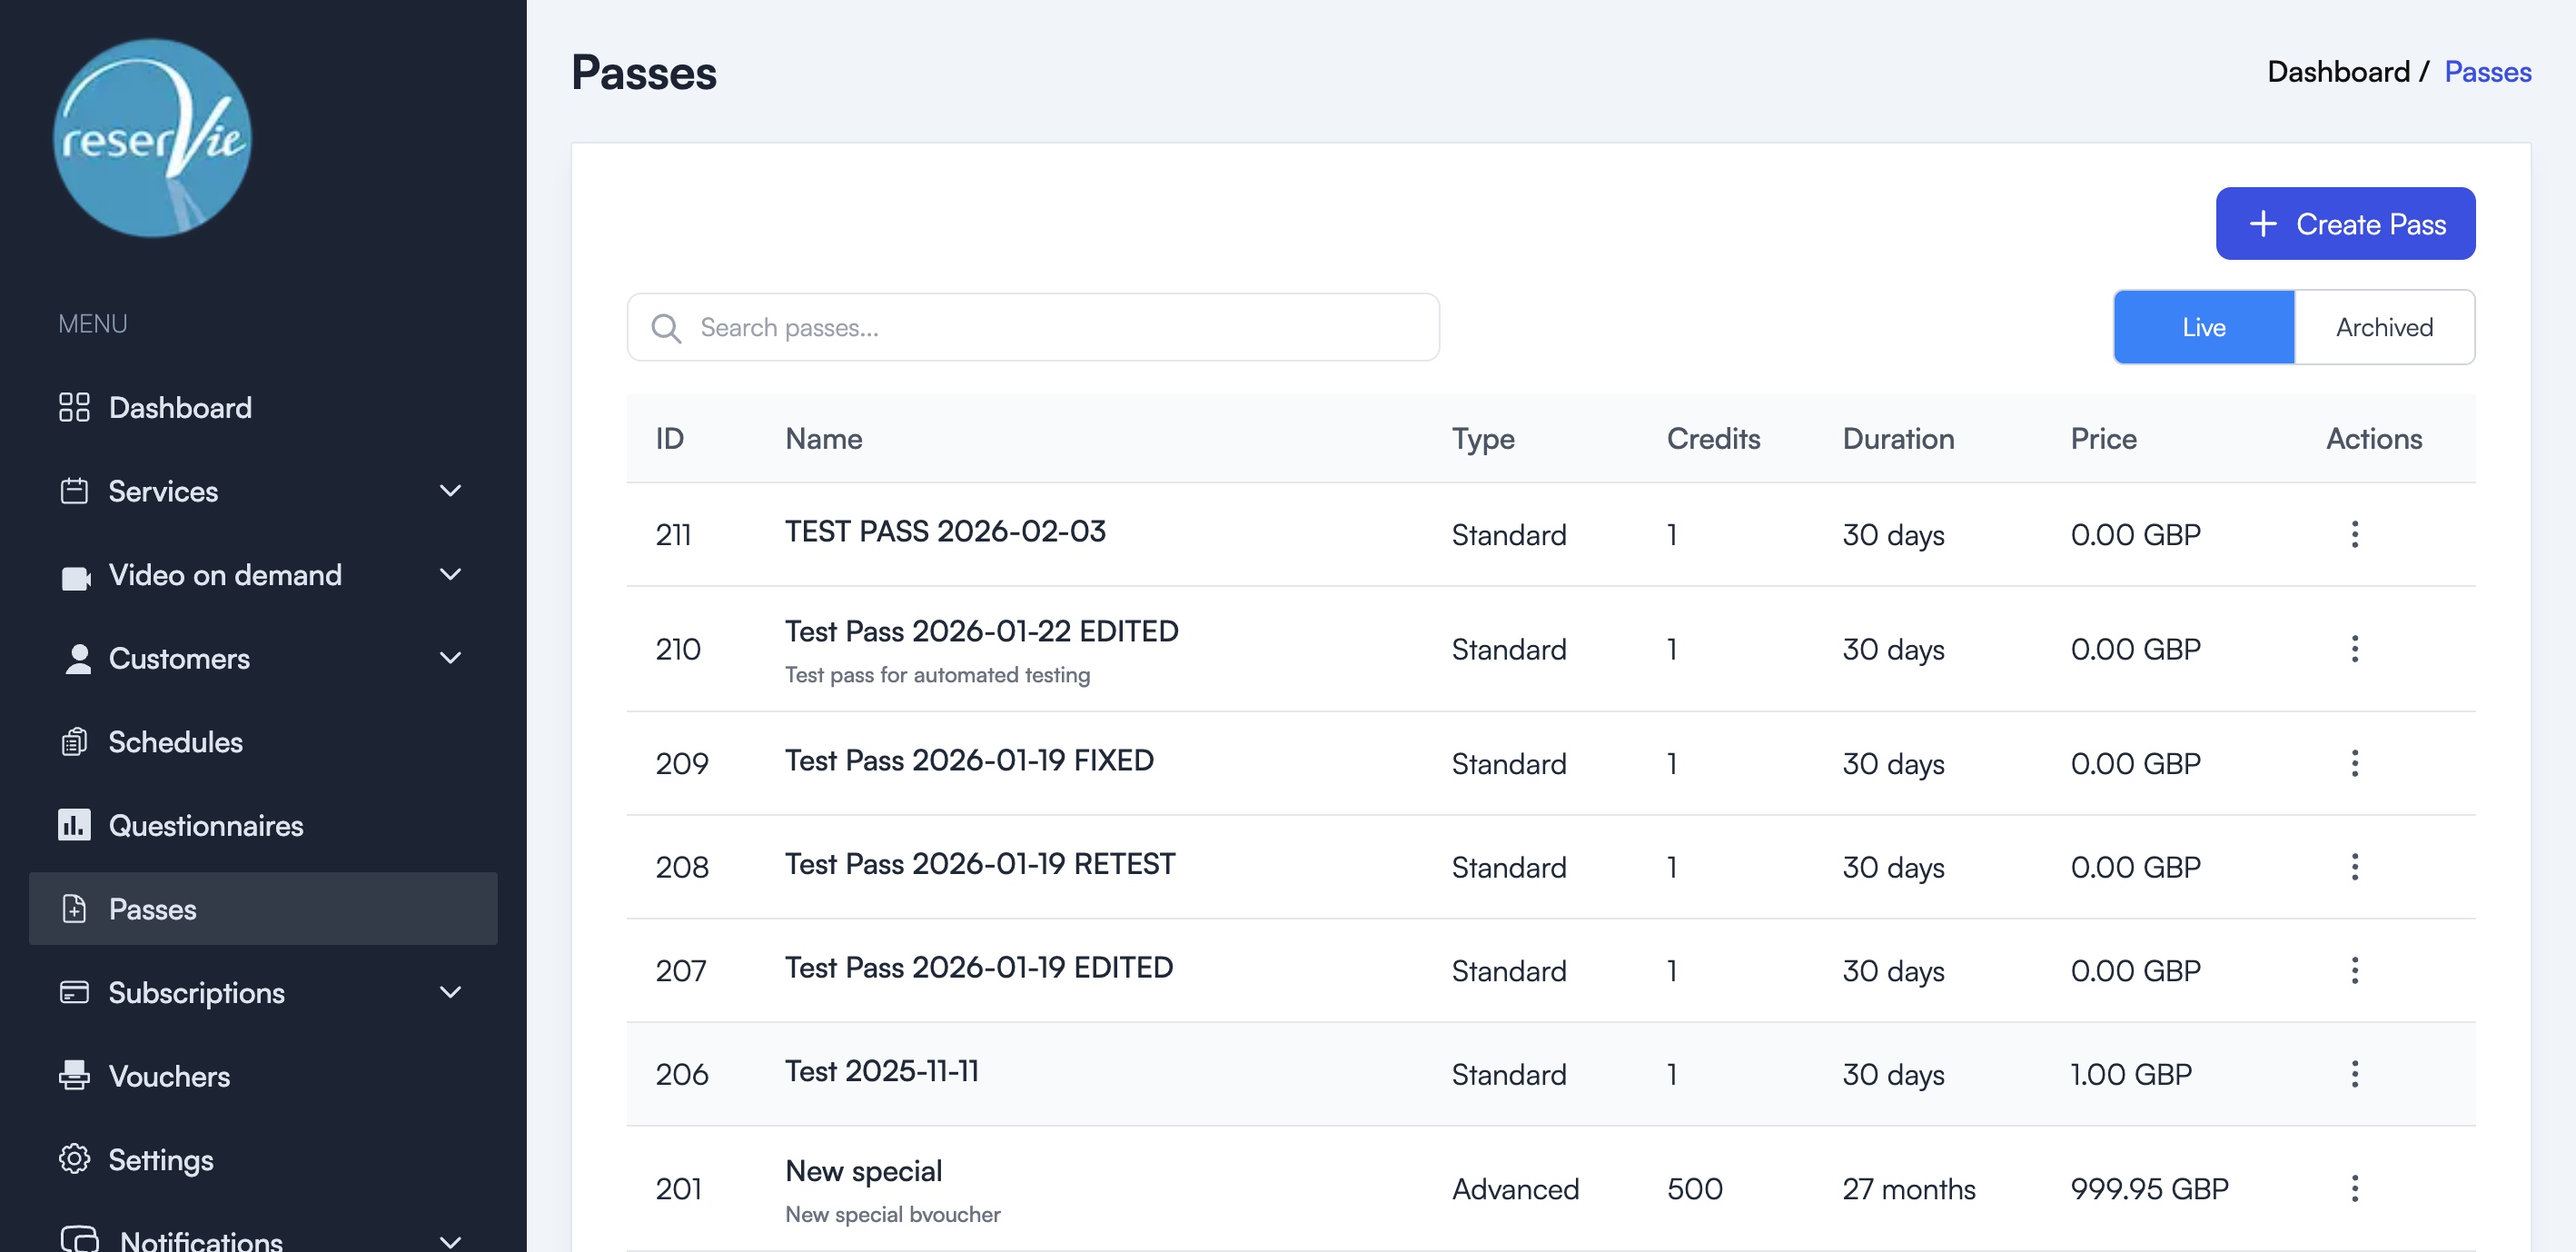
| Column | Description |
|---|---|
| ID | The unique pass identifier |
| Name | The pass name (shown to customers) |
| Type | Standard or Advanced |
| Credits | The number of credits included |
| Duration | How long the pass is valid |
| Price | The purchase price |
| Actions | Edit or manage the pass |
Creating a new pass
- Navigate to Passes from the sidebar menu.
- Click the + Create Pass button.
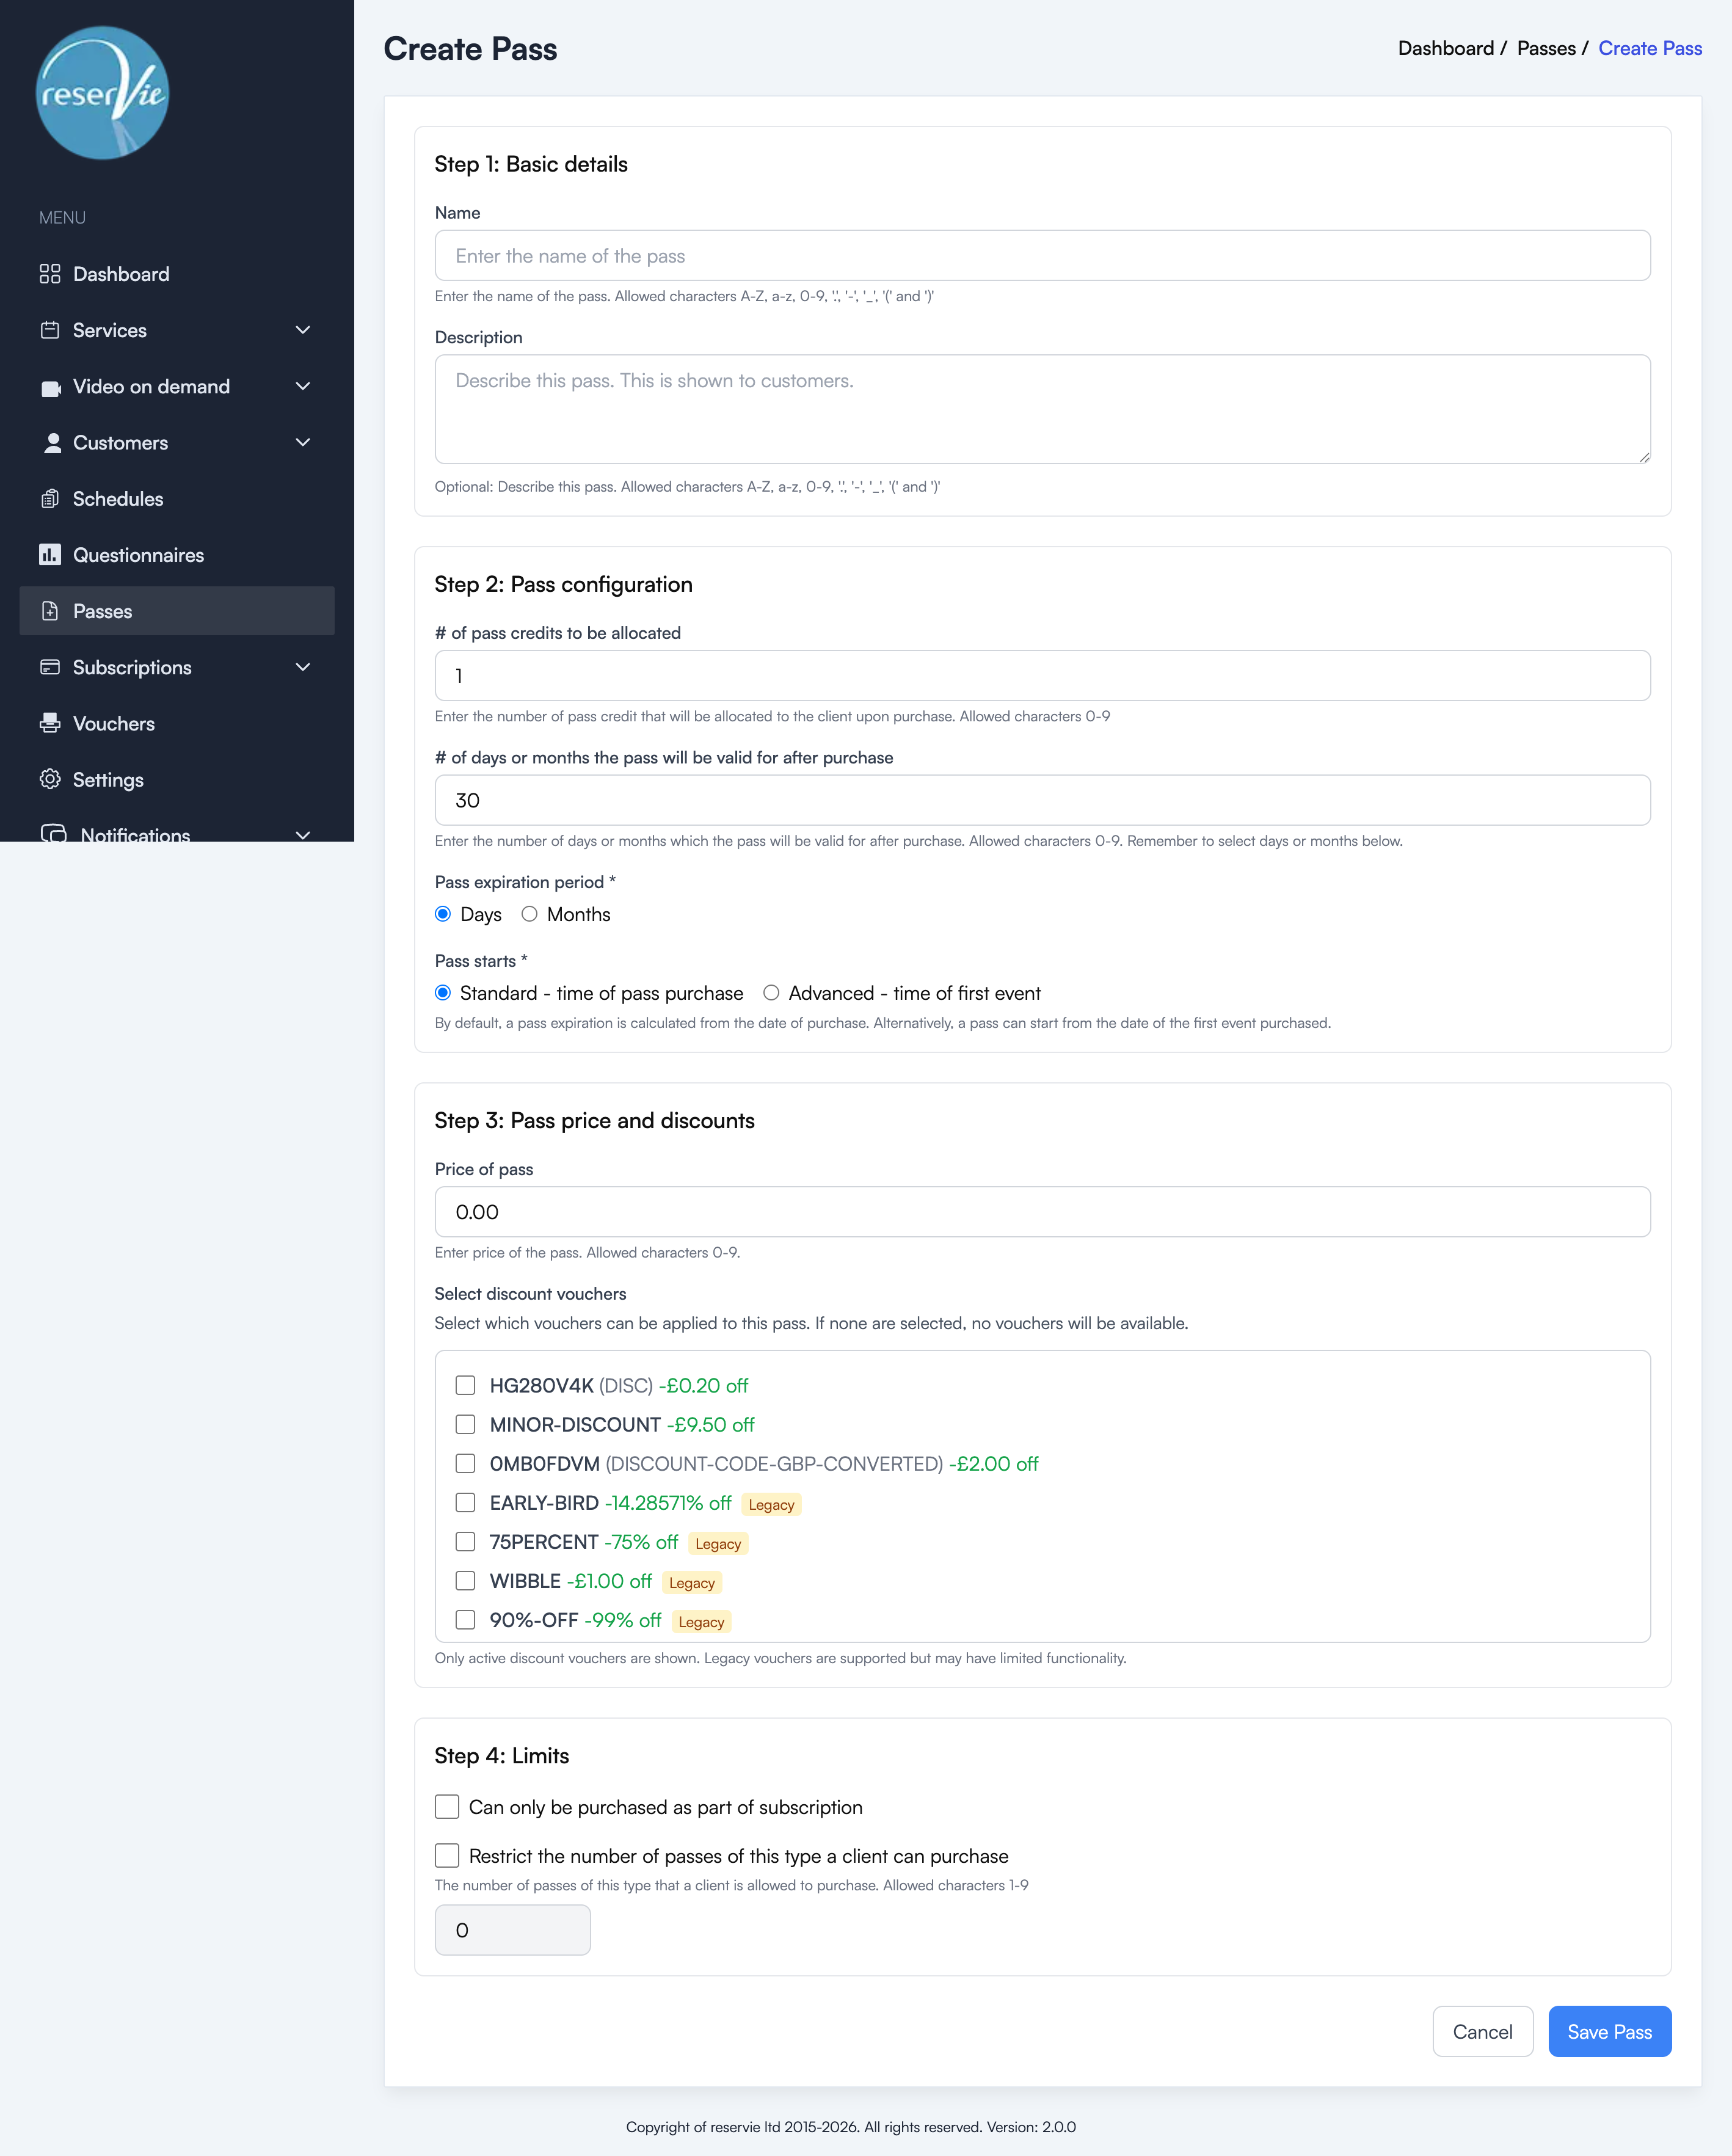
The pass editor is divided into four steps:
Step 1: Basic details
- Name — The name of the pass (e.g. “10 Class Pass”, “Monthly Unlimited”). This is shown to customers.
- Description — A description of the pass that is shown to customers when purchasing.
Step 2: Pass configuration
- Number of credits — The number of pass credits that can be redeemed against events. Each event booking typically uses one credit.
- Validity period — The number of days or months the pass remains active after it starts.
- Pass expiration period — Choose whether the validity period is measured in Days or Months.
- Pass starts — Choose when the validity period begins:
- Standard — Starts from the time of purchase.
- Advanced — Starts from the time of the first event booked using the pass.
Step 3: Pass price and discounts
- Price — The gross price the customer pays for the pass.
- Select discount vouchers — Choose which discount vouchers can be applied when purchasing this pass. Vouchers marked as Legacy were migrated from the previous version of Reservie.
Note: The price (or the price after discount) must be at least £1, $1, or 1 Euro depending on your currency. Free passes are not supported.
Step 4: Limits
- Can only be purchased as part of a subscription — If enabled, the pass cannot be bought individually and is only available through a subscription.
- Restrict the number of passes of this type a client can purchase — If enabled, limits how many passes of this type a single customer can own.
Click Save Pass to create the pass.
Editing a pass
- Navigate to Passes from the sidebar menu.
- Find the pass you want to edit in the table.
- Click the three-dot menu in the Actions column and select Edit.
- Modify the pass settings as needed and click Save Pass.
Archiving a pass
To remove a pass from sale without deleting it:
- Click the three-dot menu in the Actions column.
- Select Archive.
Archived passes can be viewed under the Archived tab and restored if needed.
Passes and schedules
When using schedules, passes are automatically available to customers during the booking flow. If a customer has an active pass with available credits, they can choose to use their pass when booking an event through the schedule. No additional configuration is required beyond creating the pass and assigning events to the schedule.