Overview
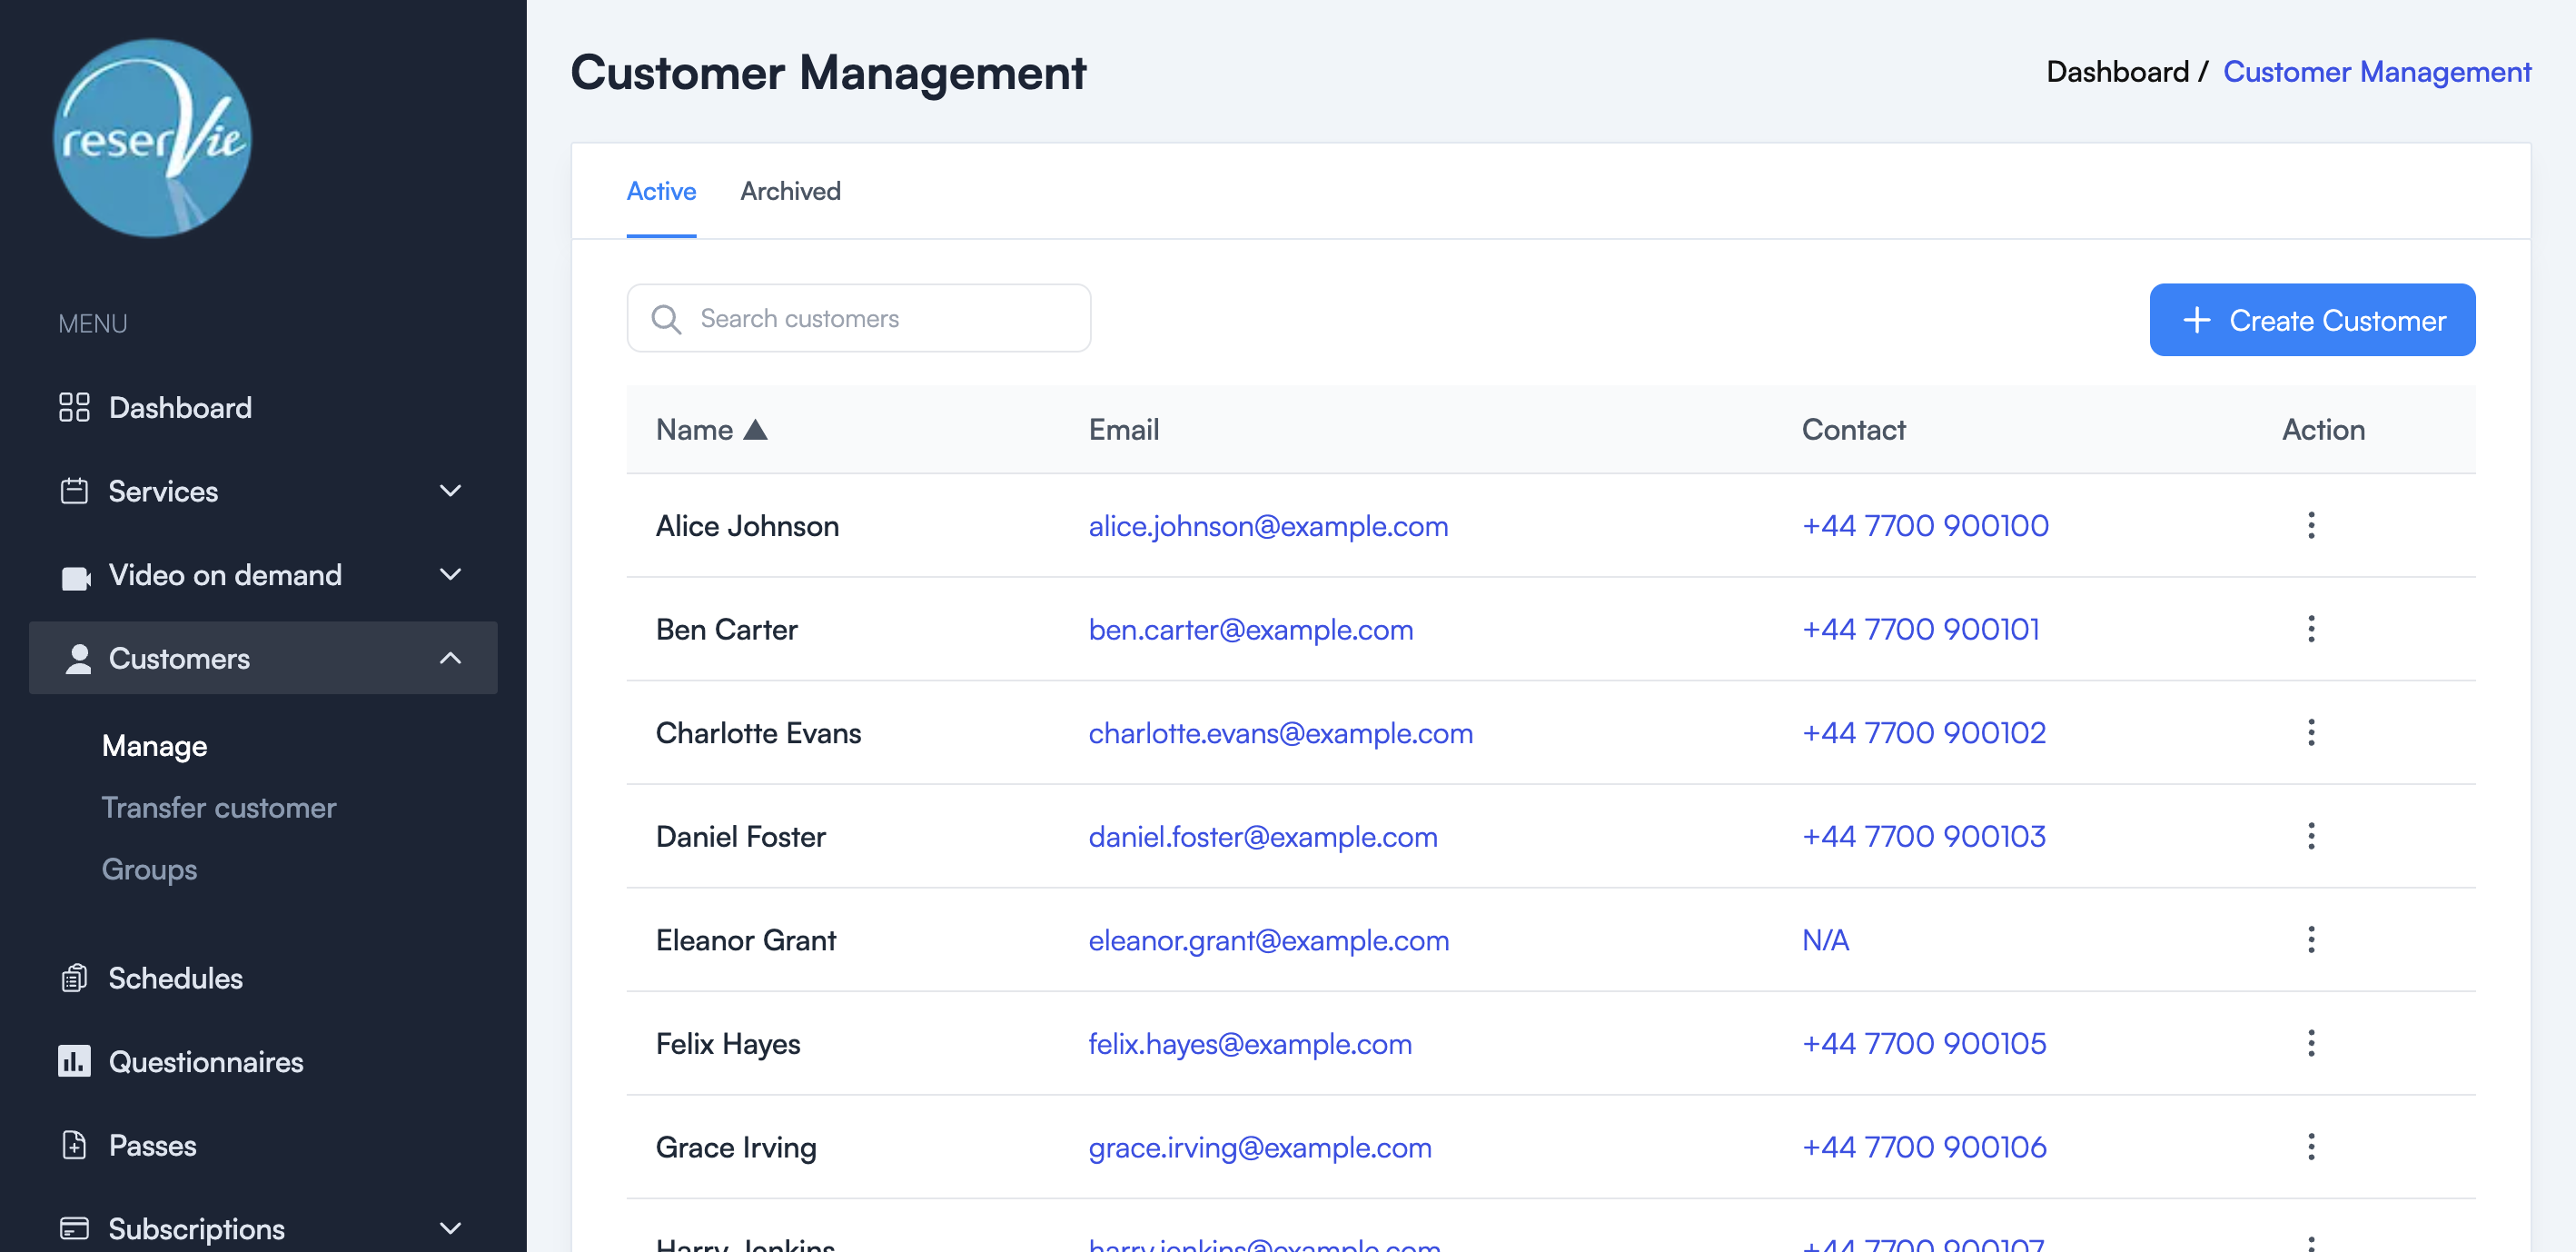
The Manage page is the main hub for working with your customer records. You can browse, search, and take actions on individual customers from here.
Navigate to Customers > Manage from the sidebar menu.
Viewing customers
The customer list displays all your customers in a table with the following columns:
| Column | Description |
|---|---|
| Name | The customer’s full name (click to view details) |
| The customer’s email address | |
| Contact | The customer’s phone number |
| Action | Menu with management options |
Use the Active and Archived tabs to switch between current and archived customers.
Searching
Use the search bar to find customers by name. Results update as you type.
Sorting
Click the Name column header to toggle alphabetical sorting.
Creating a customer
To manually add a new customer:
- Click the + Create Customer button.
- Fill in the required fields:
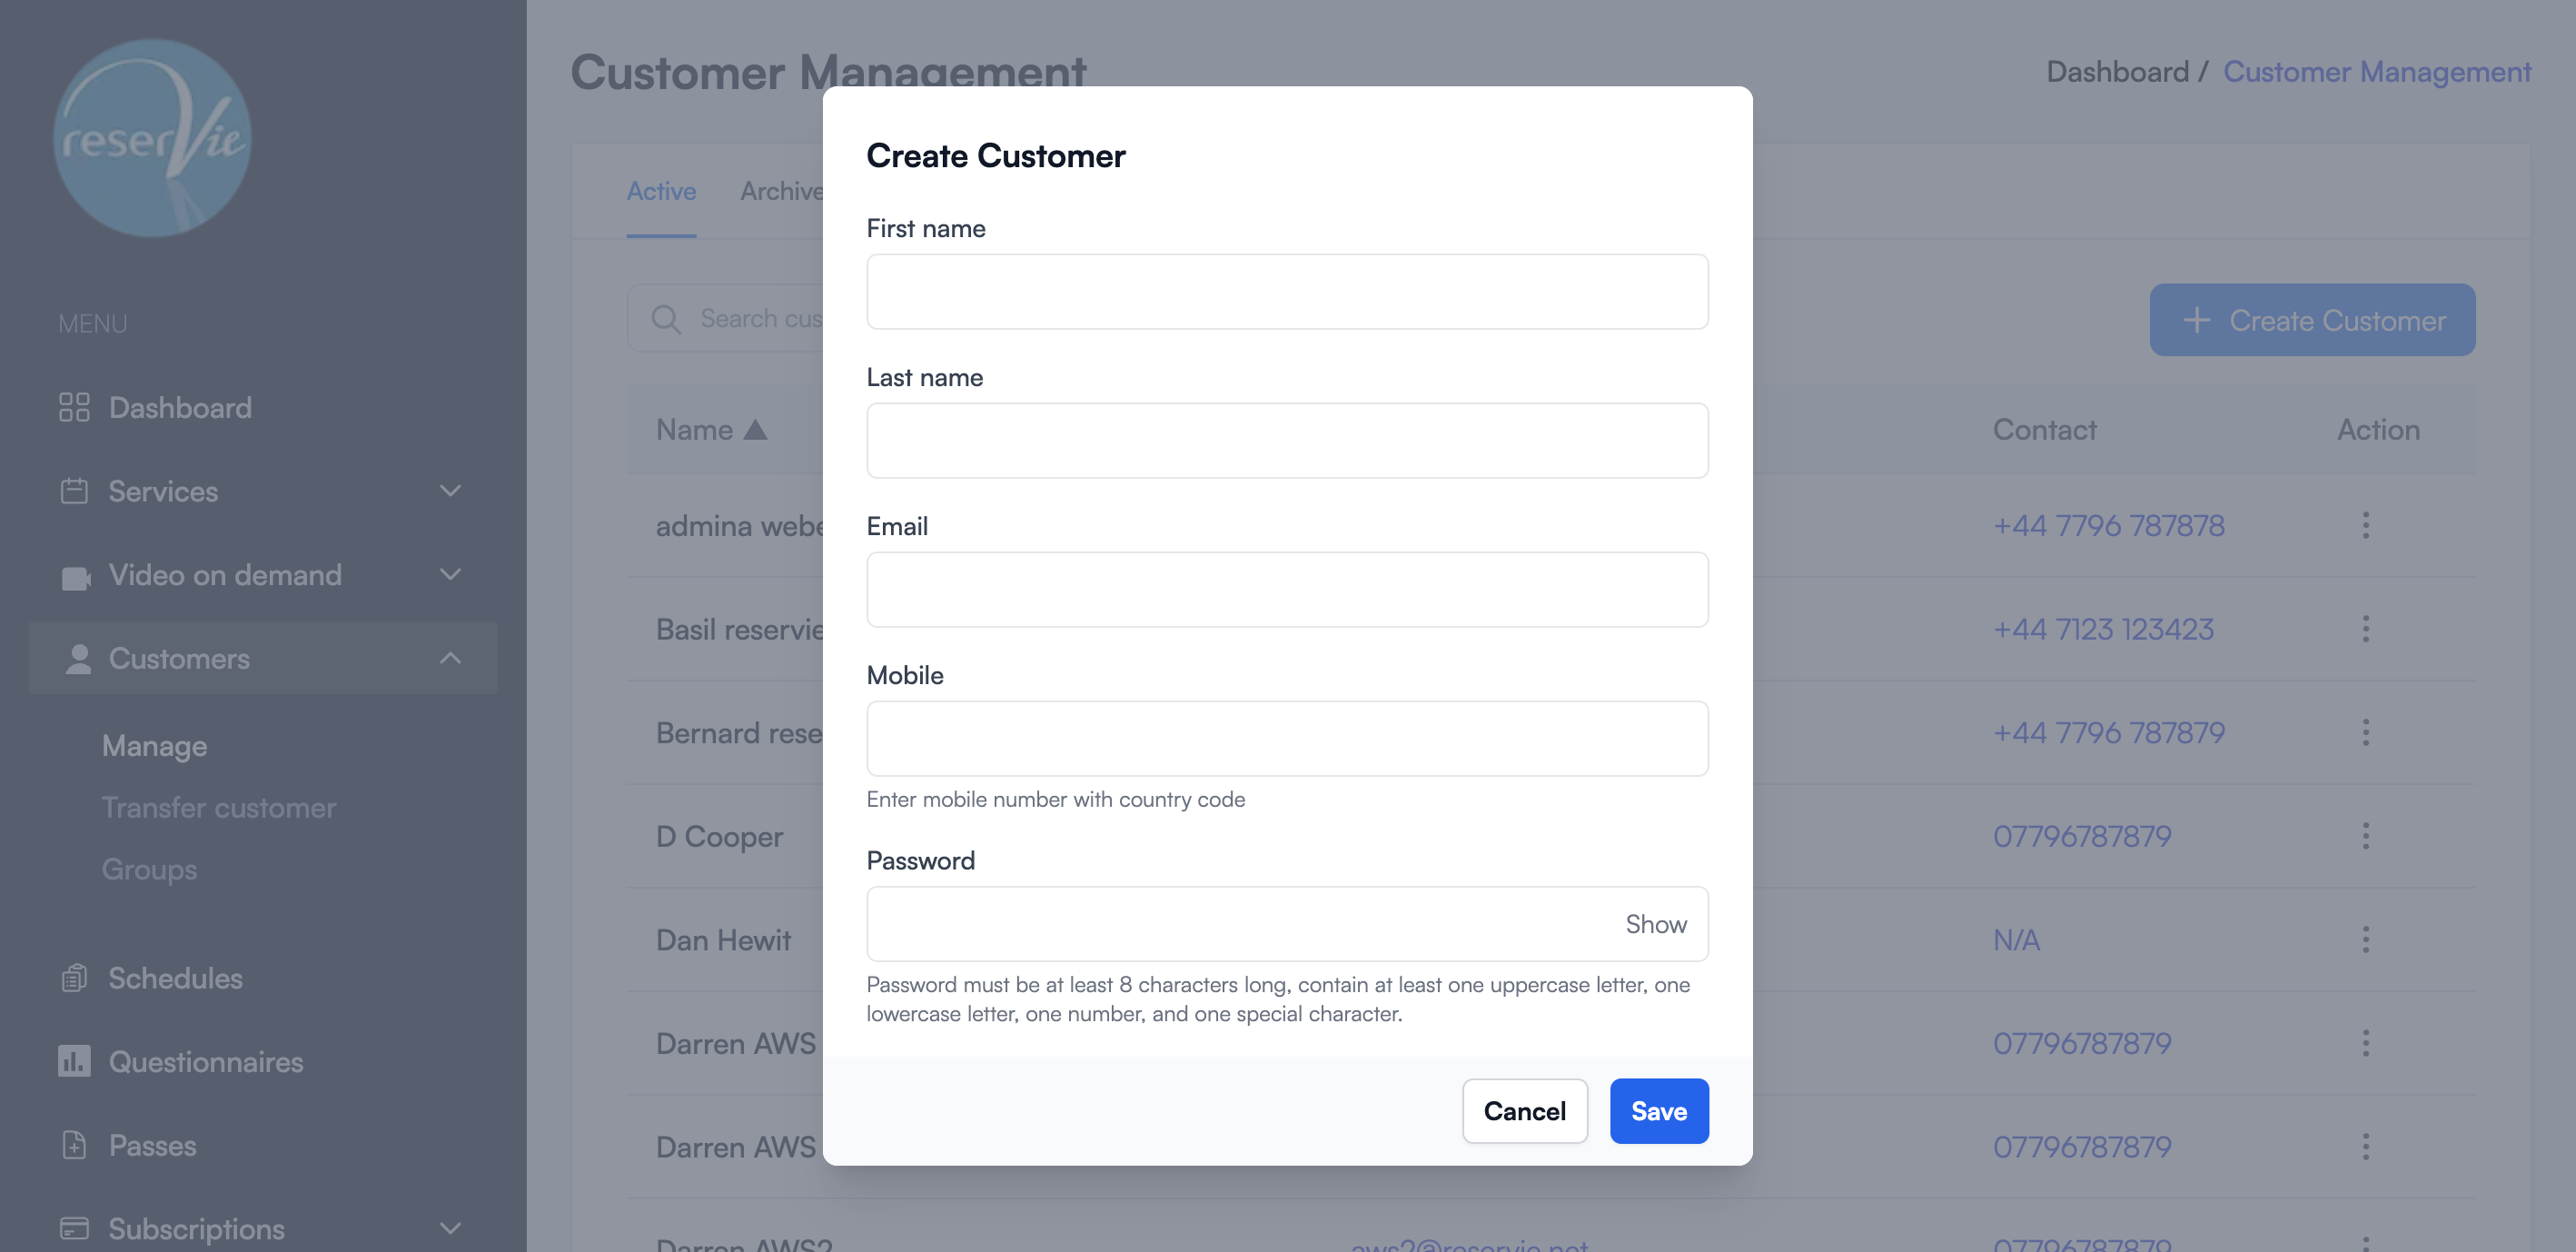
| Field | Description |
|---|---|
| First name | The customer’s first name |
| Last name | The customer’s last name |
| The customer’s email address (used for login) | |
| Mobile | Phone number with country code |
| Password | Must be at least 8 characters with uppercase, lowercase, number, and special character |
- Click Save to create the customer account.
Note: The customer will receive login credentials for the customer portal once their account is created.
Customer actions
From the action menu (three dots) on each customer row, you can:
| Action | Description |
|---|---|
| Manage | Open the full customer details page |
| Edit Contact | Open a modal to update the customer’s details |
| Archive | Move the customer to the Archived tab |
| Delete | Permanently remove the customer record |
Edit Contact
Clicking Edit Contact opens a modal with the same fields as Create Customer (First name, Last name, Email, Mobile, Password), pre-populated with the customer’s current details. The Password field is optional — leave it blank to keep the existing password, or enter a new one to reset it.
Archive and Delete
Both Archive and Delete execute immediately when clicked — there is no confirmation dialog.
- Archive moves the customer to the Archived tab, where they can be restored later.
- Delete permanently removes the customer record and cannot be undone.
Tip: Use Archive instead of Delete if you may need the customer record again in the future.
Archived customers
Switch to the Archived tab to view archived customers. The action menu for archived customers shows Activate instead of Archive, which restores the customer back to the Active list.
Customer details page
Clicking Manage opens the customer’s full profile page.
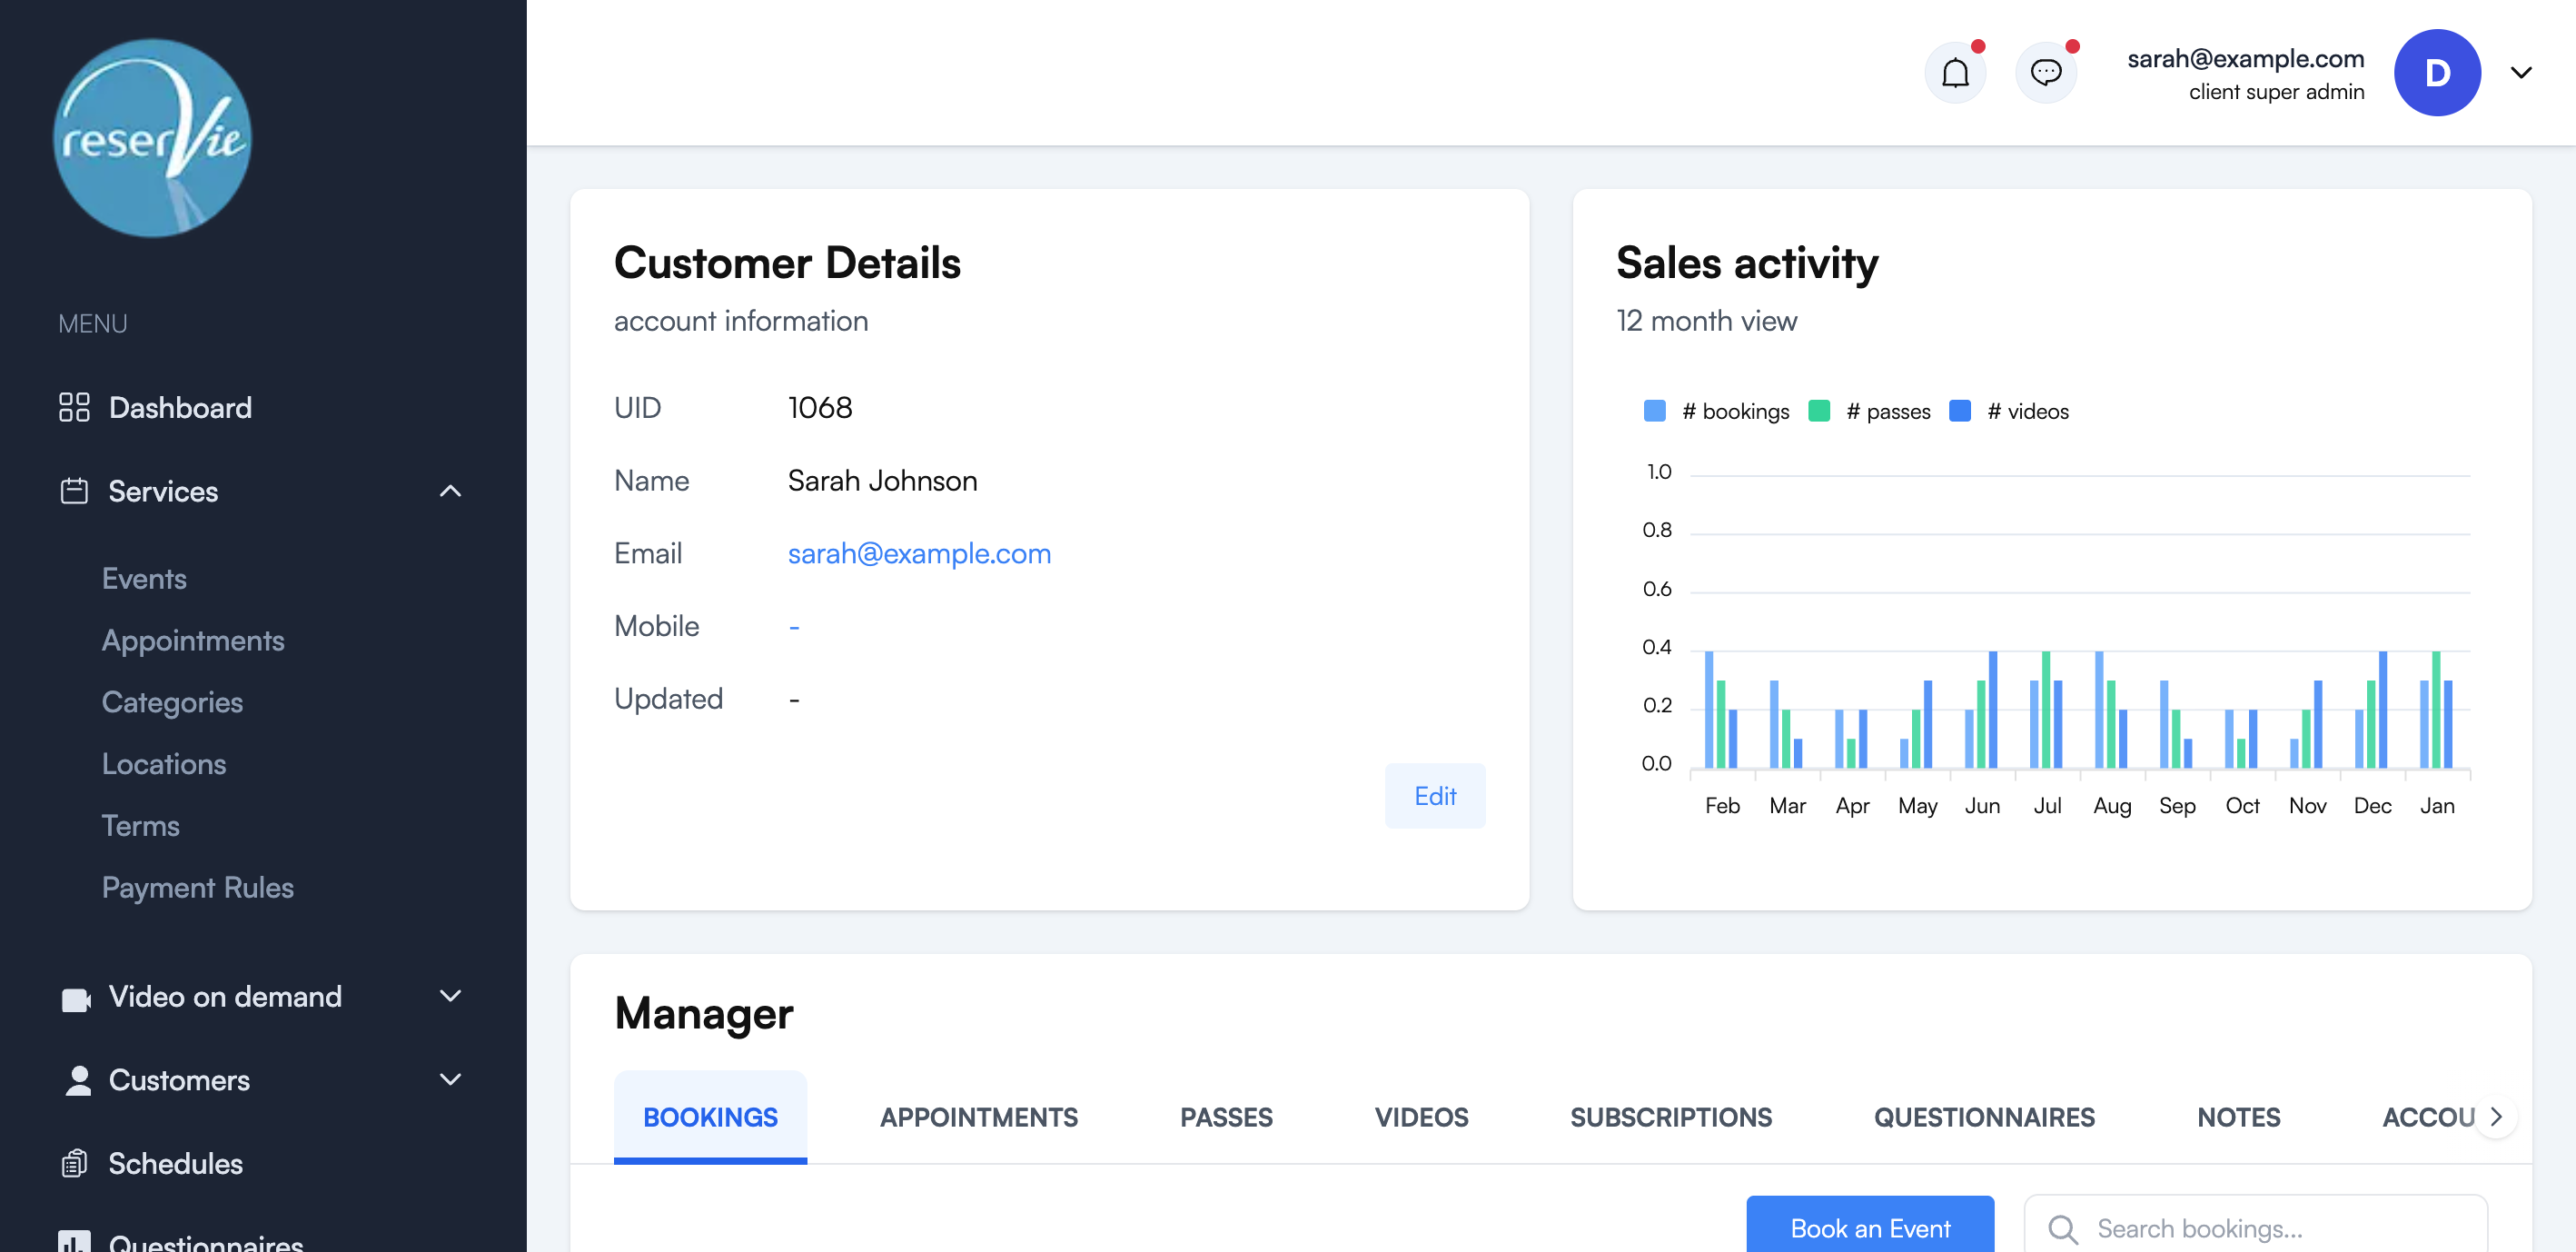
Account information
The top section displays:
- UID — The unique customer identifier
- Name — The customer’s full name
- Email — Their email address (clickable to send an email)
- Mobile — Their phone number (clickable to call)
- Updated — When the record was last modified
Click Edit to update any of these fields.
Sales activity
A 12-month bar chart shows the customer’s purchase activity across three categories: bookings, passes, and videos. This gives you a quick visual overview of customer engagement.
Manager tabs
The lower section provides detailed views across eight tabs. Each tab includes search functionality and pagination for customers with extensive history.
Bookings
Displays all event bookings in a table:
| Column | Description |
|---|---|
| ID | Booking identifier |
| Booked on | Date the booking was made |
| What | Event name |
| When | Event date, time, and timezone |
| Price | Booking price (e.g. £10.00 or 1 CR for pass credits) |
| State | Payment state — Manual, Completed, Cancelled, or Package |
| Actions | Transfer, Cancel, or Refund the booking |
Completed Stripe payments display a Stripe icon next to the state. The Refund action is only available for bookings paid via Stripe.
Click Book an Event to manually register the customer for an event — useful when taking bookings on behalf of a customer (e.g. over the phone).
Appointments
Displays all appointment bookings in a table:
| Column | Description |
|---|---|
| ID | Appointment identifier |
| Booked on | Date the appointment was created |
| Service | The appointment service type |
| Facilitator | The facilitator assigned to the appointment |
| When | Appointment date and time |
| Duration | Length of the appointment |
| Payment | Price charged |
| Status | Scheduled or Cancelled |
| Actions | Action menu |
Click Book Appointment to manually book an appointment for the customer.
Passes
Displays all passes assigned to the customer:
| Column | Description |
|---|---|
| ID | Pass identifier |
| Purchased | Date the pass was purchased |
| Pass | Pass name |
| Dates | Start and end dates of the pass validity period |
| Available | Number of remaining uses on the pass |
| Price | Pass price |
| State | Completed or Manual |
| Actions | Action menu |
Click Assign Pass to manually assign a pass to the customer.
Videos
Displays all video on demand purchases:
| Column | Description |
|---|---|
| ID | Video purchase identifier |
| Purchased | Date the video was purchased |
| Name | Video title |
| Expires | Expiry date (or — for no expiry) |
| Price | Purchase price (or CR for pass credits) |
| State | Active, Cancelled, or Expired |
| Actions | Action menu |
Click Assign Video to manually assign a video to the customer.
Subscriptions
Displays all subscription mandates:
| Column | Description |
|---|---|
| ID | Subscription identifier |
| Created | Date the subscription was created |
| Plan | Subscription plan name |
| Next payment | Date of the next scheduled payment |
| Price | Recurring price |
| State | Active, Paused, or Suspended |
| Actions | Action menu |
Questionnaires
Displays completed questionnaire responses in a card layout. Each card shows the questionnaire name, ID, status, created/updated dates, and a summary of how many answers were submitted.
Click View Details to see the full questionnaire response, or click Assign Questionnaire to assign a new questionnaire to the customer.
Notes
Displays internal notes about the customer in a card layout. Each note shows the note ID, when it was created, who created it, and the note content.
Each note has View, Edit, and Delete actions. Click Add Note to create a new internal note — useful for recording special requirements, communication history, or other information about the customer.
Account
Provides account-level management actions:
- Archive Customer — Hides the customer from active lists but preserves all their data. They can be unarchived later.
- Merge Customer — Combines this customer’s data with another customer account and archives this account. This action cannot be undone.
- Account History — Shows the customer ID and account history.