Overview
Events are created and edited using a 4-step wizard. Both Add Event and Edit Event use the same wizard — when editing, fields are pre-filled with the existing settings.
To start a new event, go to Services → Events and click + Add Event.
The wizard steps are:
- Create your event — what type, what it’s called, and when it happens
- Pricing & booking — how customers book and pay
- Configure (optional) — notification overrides, categories, facilitators, location, terms
- Review & publish — check everything and make it live
You can step backwards at any point, and from Step 2 onwards you can use Skip to review to jump straight to the final step.
Step 1 — Create your event
This step combines three sections on a single page: type, details, and scheduling.

Choose the event type
| Type | What it does |
|---|---|
| In Person | Face-to-face sessions at a physical location. No meeting link is sent. |
| Virtual | Online sessions via Zoom. Meeting links are issued automatically (Zoom must be connected first). |
Event details
| Field | Notes |
|---|---|
| Event name (required) | The name customers see when browsing and booking. Keep it short and recognisable. |
| Description (optional) | Tell customers what to expect. Use this for what’s covered, who it suits, what to bring. |
When does it happen?
Pick how your dates are created:
| Option | When to use it |
|---|---|
| I’ll add dates myself | One-off workshop, irregular schedule, or you want full control over each date |
| Auto-generate recurring dates | Weekly or monthly classes that follow a pattern |
Adding dates manually
Click dates on the calendar to select them — multiple dates can be selected by clicking each one. Then on the right:
| Field | What it controls |
|---|---|
| Time | The start time applied to every selected date |
| Duration (minutes) | How long each session lasts |
| Timezone | The timezone the time is in (defaults to your account timezone) |
When you have your selection, click Add dates. The chosen dates appear in the Your dates list below where you can edit or remove them individually.
Auto-generating recurring dates
Choose the recurrence (weekly / monthly) and the system will generate dates for the period you specify. Each generated date can still be edited or removed individually after creation.
When dates and details are set, click Continue to move to Step 2.
Step 2 — Pricing & booking
This step controls how customers book and how much they pay.
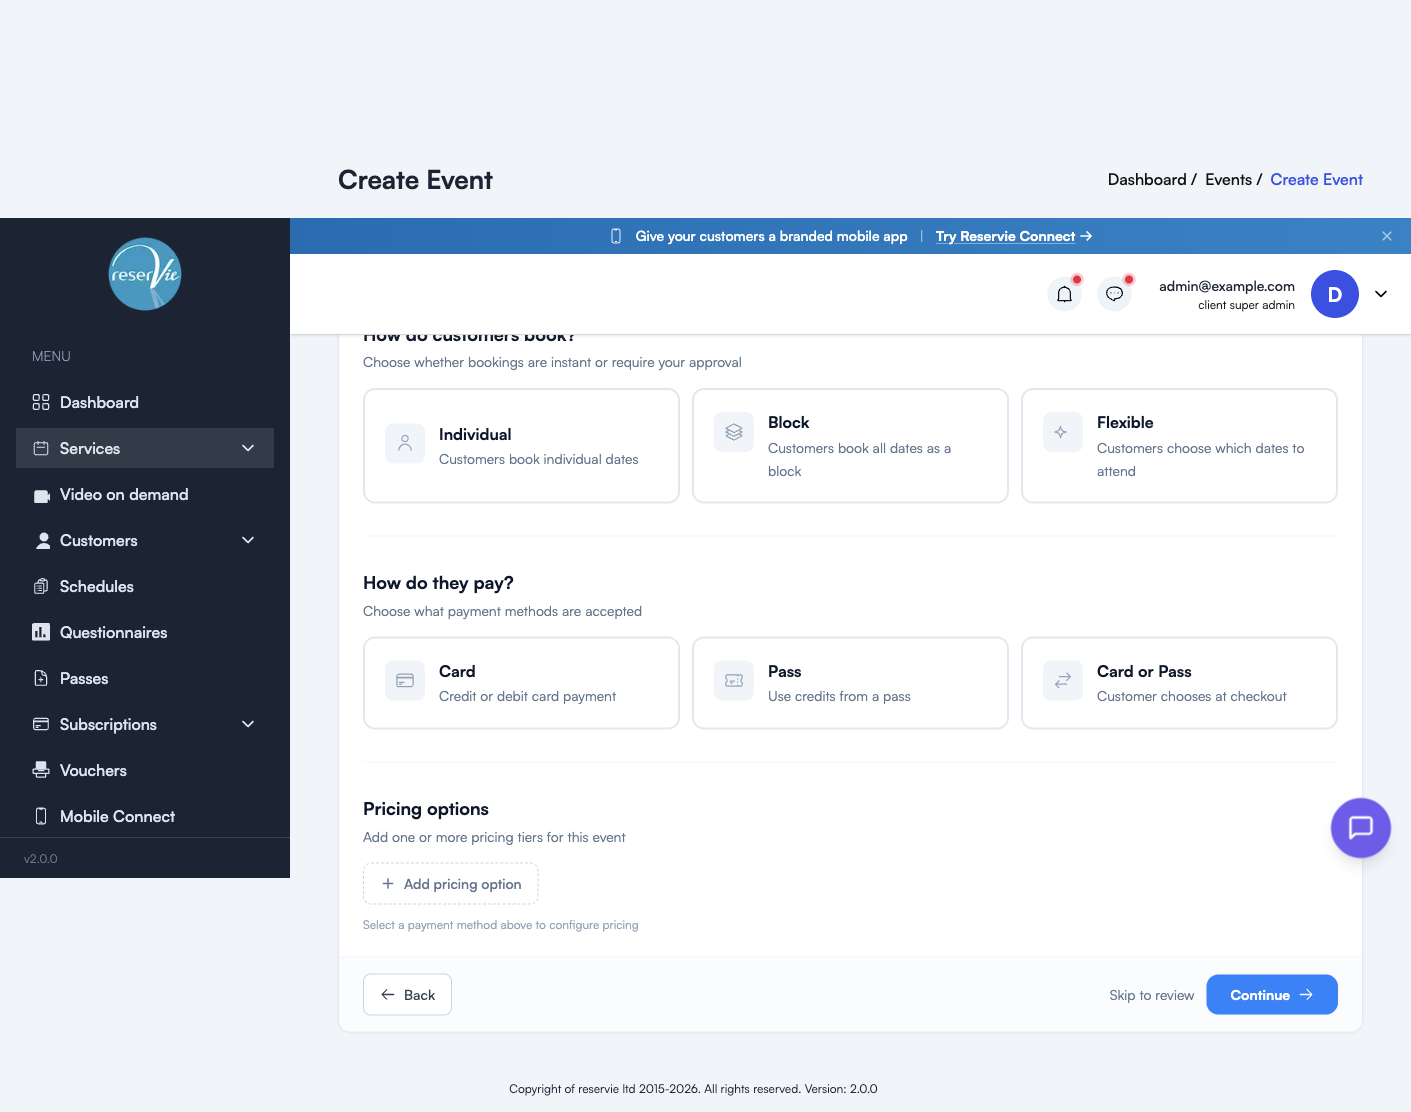
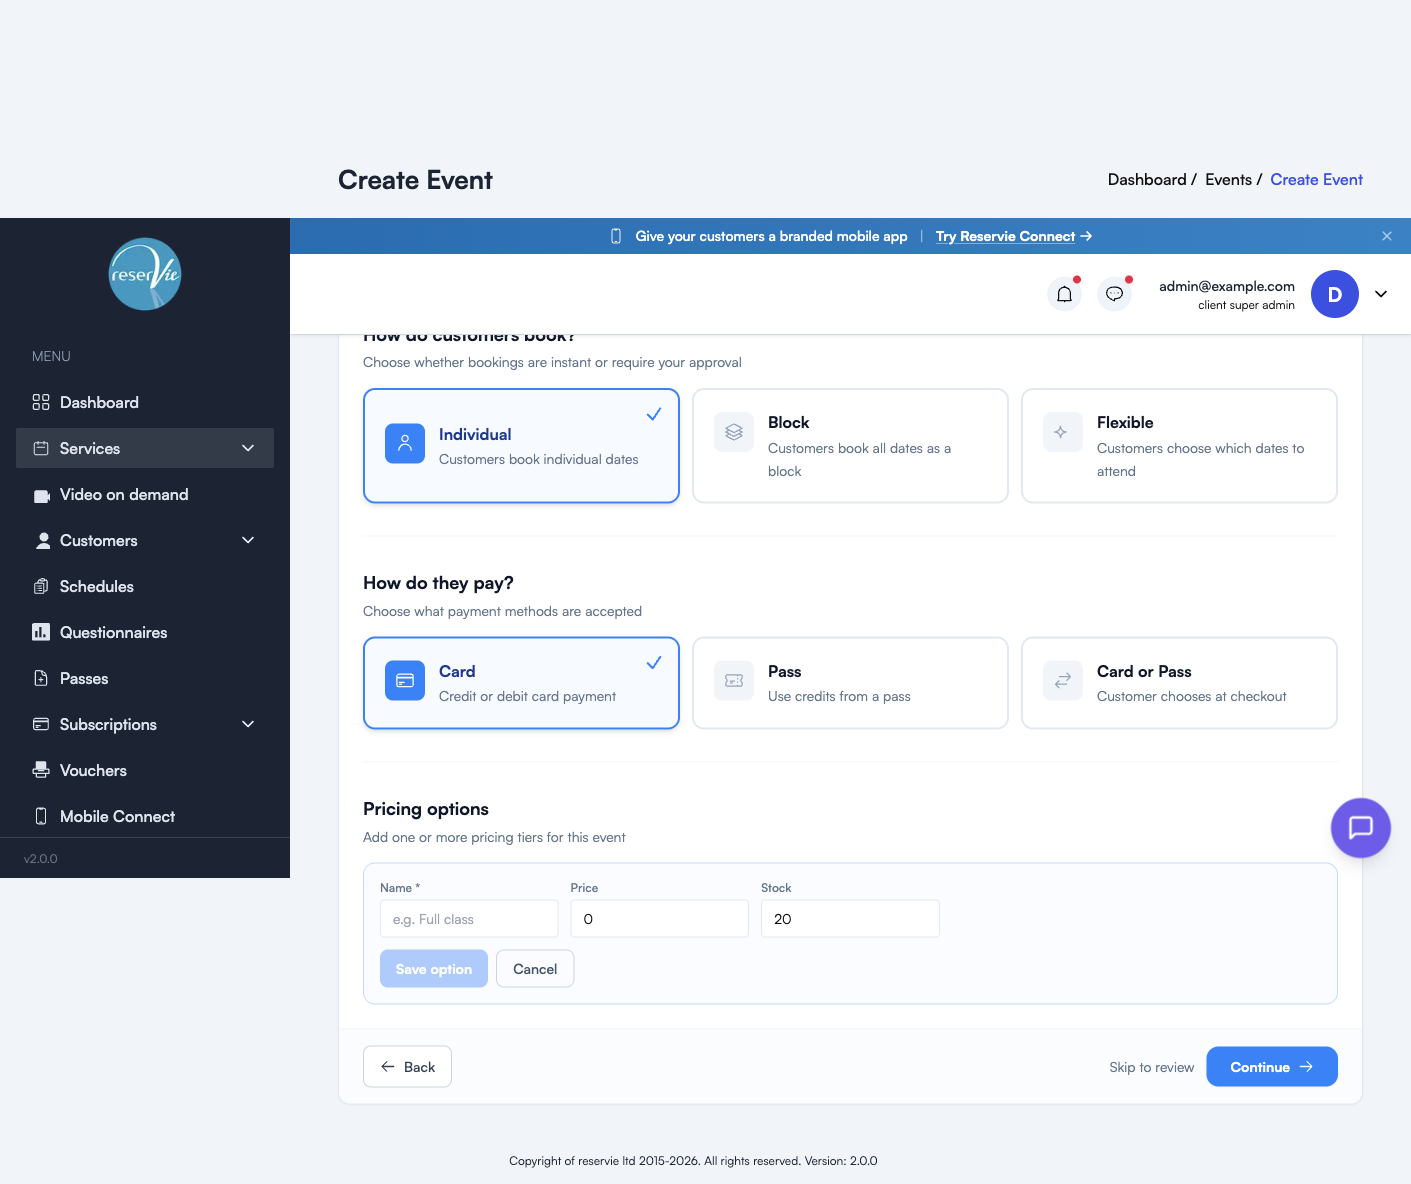
How do customers book?
| Type | What it means for customers |
|---|---|
| Individual | Customers can pick and book single dates of the event |
| Block | All dates must be booked together as one block (good for courses) |
| Flexible | Encourages booking the whole block, but allows individual date selection |
How do they pay?
| Method | Use case |
|---|---|
| Card | Credit or debit card payment via Stripe |
| Pass | Pay using credits from a pass the customer already owns |
| Card or Pass | Customer chooses at checkout |
Pass-only or Card-or-Pass requires you to have a Pass set up that’s eligible for this event. See Getting Started with Passes.
Pricing options
Click + Add pricing option to define a tier. Each tier has:
| Field | Notes |
|---|---|
| Name (required) | The label customers see — e.g. “Standard”, “Concession”, “Drop-in” |
| Price (required) | The price in your account currency. Set to 0 for free tiers. |
| Stock (required) | How many places this tier opens up |
| Pass Credits (only for Pass / Card-or-Pass) | How many credits a pass-holder spends to book this tier |
Click Save option to add it. You can add multiple tiers — for example, an early-bird tier alongside a standard tier — and reorder, edit, or remove them at any time.
Vouchers and payment rules
Below pricing, you can attach existing vouchers (discount codes) or payment rules (automatic discounts based on quantity). Both must be created in their own sections first — see Vouchers and Event Configuration.
Step 3 — Configure (optional)
This step is entirely optional. Two collapsible sections, each off by default — turn either on only if you need to override the defaults.
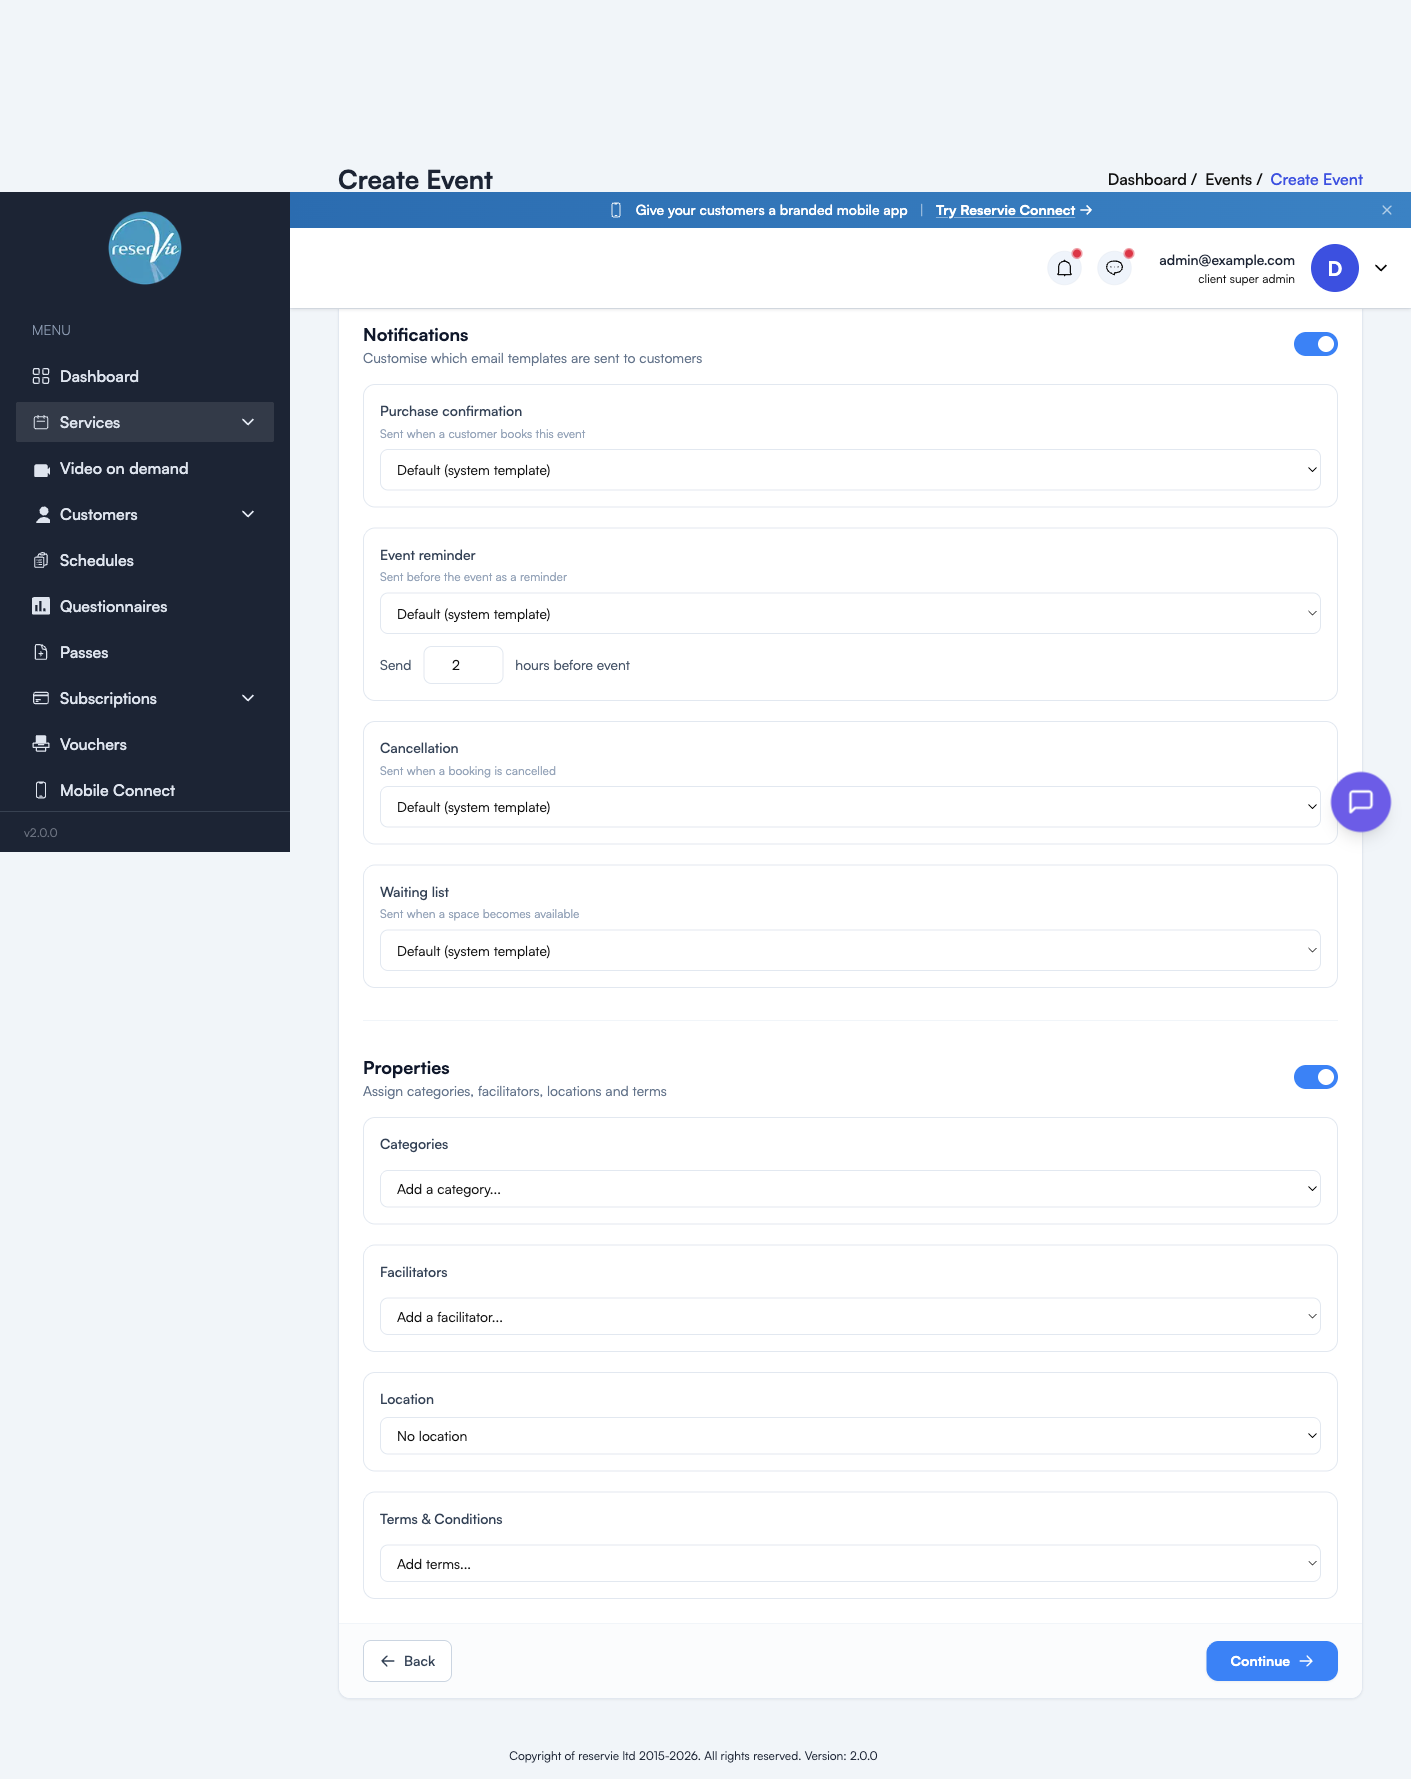
Notifications
Turn this on to override the default notification templates for this event only. Other events keep using the defaults from Notifications → Templates.
| Notification | When it sends | Override option |
|---|---|---|
| Purchase confirmation | When a customer books this event | Choose a custom template (or keep system default) |
| Event reminder | A configurable number of hours before each date | Custom template + hours-before setting |
| Cancellation | When a booking is cancelled | Custom template |
| Waiting list | When a space opens up for a customer on the waiting list | Custom template |
If you leave this section off, the system templates from Notifications → Templates are used for every notification.
Properties
Turn this on to attach reusable configuration:
| Property | What it does |
|---|---|
| Categories | Tag the event with one or more categories so customers can browse/filter it |
| Facilitators | Set which instructor(s) are running the event — shown to customers and used in reports |
| Location | Pick a saved physical location (the address is shown in confirmations) |
| Terms & Conditions | Attach event-specific terms shown at checkout in addition to your standard terms |
All four are managed in their own sections under Services. See Event Configuration for how to set them up.
Step 4 — Review & publish
A read-only summary of every section. Each panel has an Edit link that jumps you straight back to the relevant step.
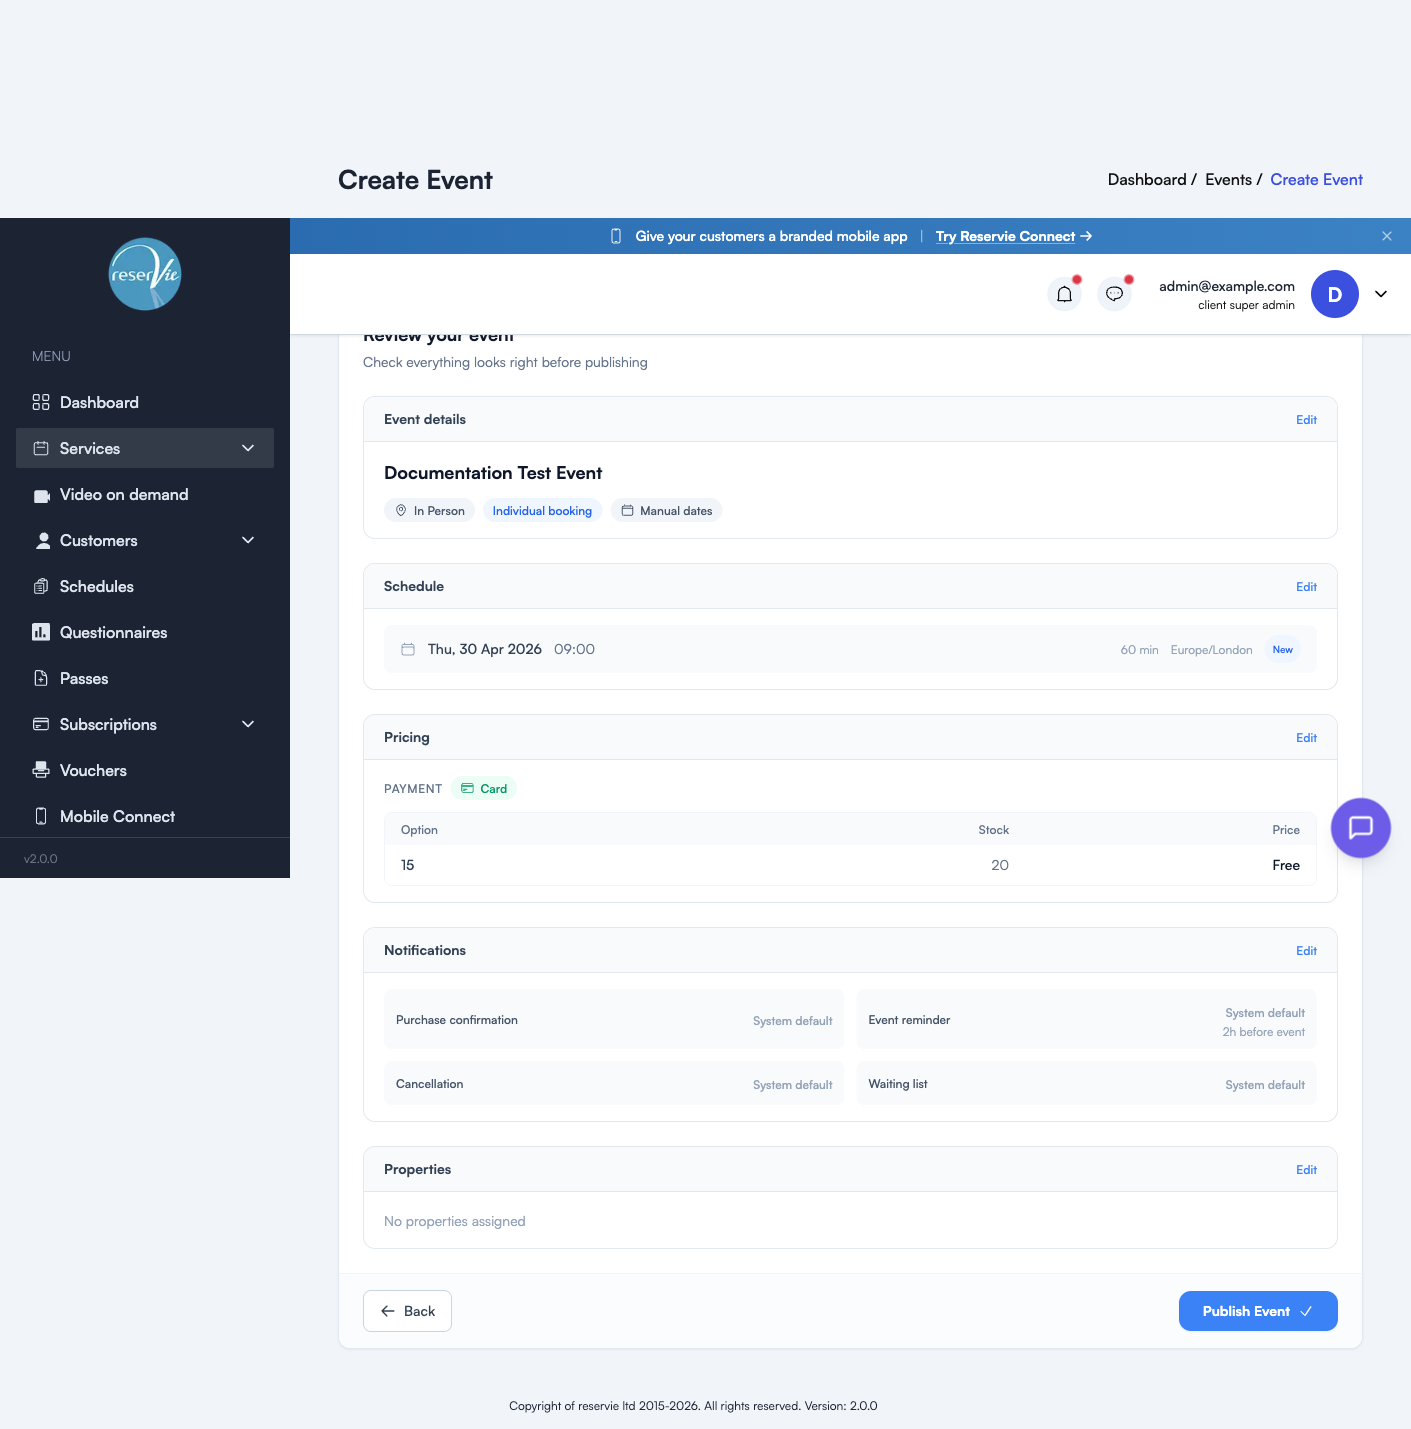
| Panel | Shows |
|---|---|
| Event details | Name + chips: type (In Person / Virtual), booking style (Individual / Block / Flexible), schedule type (Manual / Auto) |
| Schedule | Every date with time, duration, timezone, and a “New” badge for newly added dates |
| Pricing | Selected payment method, plus the pricing tiers as a table |
| Notifications | Which template is used for each notification (System default or custom) |
| Properties | Categories, facilitators, location, and terms — or “No properties assigned” |
Click Publish Event to make it live. The event appears in the Events list immediately and (assuming dates are in the future) in your customer-facing booking widgets.
Editing an existing event
Open the event editor from either:
- The action menu (three dots) on the events list → Edit Event
- The Edit Event button at the top of the event register for any date
All four wizard steps reopen with current values pre-filled. Changes apply to future bookings — past bookings are unaffected. If you change a date, customers booked onto that date are notified using the cancellation / change templates.
Cloning an event
From the action menu on the events list, click Clone. A copy is created with all settings duplicated — change just the dates (and anything else) and publish. Cloning is the fastest way to roll a course over to next term, or to spin up a near-identical sister event with different pricing.